Exporting data from QuickBooks Online to QuickBooks Desktop can be a complex yet beneficial process for businesses requiring more features and customization options.
QuickBooks Desktop offers compatibility with other software, customization, real-time data access, and more control over your accounting processes.
In this guide, we will discuss how to export QuickBooks Online into QuickBooks Desktop.
Preparing Your QuickBooks Online Data for Export
Before you can export your data from QuickBooks Online, it’s essential to ensure that your QBO account is properly organized and up-to-date.
This includes reconciling your accounts, categorizing transactions, and ensuring that all necessary information is accurately recorded.
By taking these preparatory steps, you can streamline the export process and minimize the risk of data discrepancies.
-
Reconcile Your Accounts:
Ensure that all your bank and credit card accounts are reconciled in QuickBooks Online. This will help you maintain the integrity of your financial data and avoid any potential issues during the export process.
-
Categorize Your Transactions:
Review and categorize all your transactions in QuickBooks Online to ensure that your data is organized and ready for export. This will make the transition to QuickBooks Desktop much smoother.
-
Verify Data Accuracy:
Double-check your QuickBooks Online data to ensure that all information, such as customer records, vendor details, and inventory levels, is accurate and up-to-date.
Note: Whether you convert QuickBooks Online to Desktop or from QBDT to QBO, make sure to back up data files to avoid any unfortunate event.
Exporting QuickBooks Online Data Step-by-Step
Once you have prepared your QuickBooks Online data, you can proceed with the export process. Follow these steps to export your data successfully:
-
Log in to Your QuickBooks Online Account:
Access your QuickBooks Online account and navigate to the “Settings” menu.
-
Select “Export Data”:
Under the “Settings” menu, locate the “Export Data” option and click on it.
-
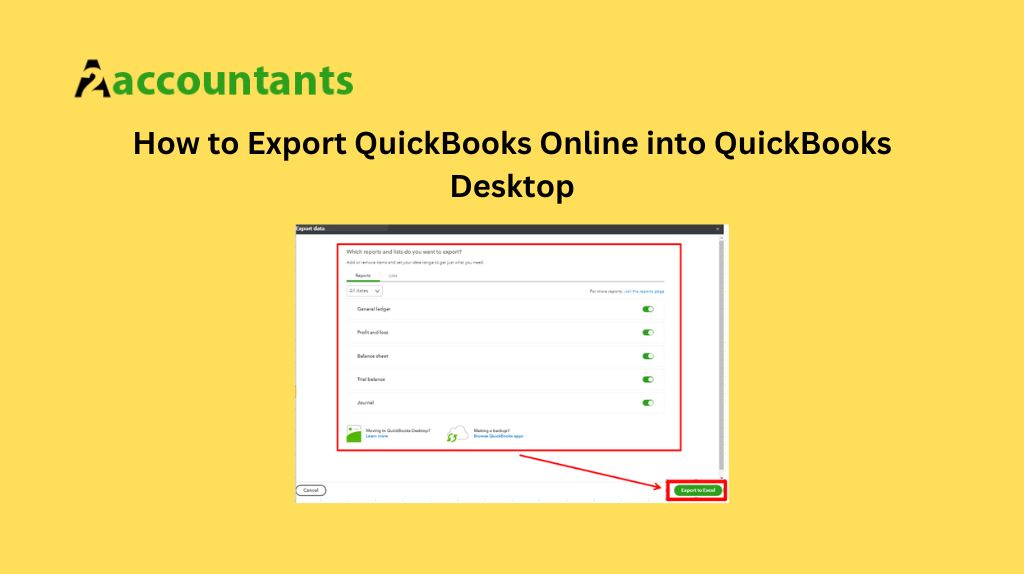
Choose the Data to Export:
Depending on your needs, you can select the specific data you want to export, such as customers, vendors, accounts, or the entire company file.
-
Select the Export Format:
QuickBooks Online allows you to export your data in various formats, including CSV, Excel, or QuickBooks-specific file types. Choose the format that best suits your requirements.
-
Review and Save the Exported Data:
Carefully review the exported data to ensure its accuracy and completeness. Once satisfied, save the exported file to your local device or cloud storage for easy access.
Importing QuickBooks Online Data into QuickBooks Desktop
With your QuickBooks Online data successfully exported, you can now proceed to import it into your QuickBooks Desktop software. Follow these steps to complete the import process:
-
Open QuickBooks Desktop:
Launch your QuickBooks Desktop application and ensure that you are in the correct company file.
-
Navigate to the “File” Menu:
From the top menu, select the “File” option.
-
Choose “Utilities” and then “Import.”:
Within the “File” menu, locate the “Utilities” option and select “Import.”
-
Select the Appropriate Import Option:
Depending on the data you exported from QuickBooks Online, choose the corresponding import option, such as “Import Company from QuickBooks Online” or “Import List.”
-
Follow the On-Screen Instructions:
Carefully follow the step-by-step instructions to successfully complete the import process.
-
Verify the Imported Data:
After the import process is complete, thoroughly review your QuickBooks Desktop data to ensure that all the information has been transferred accurately.
Conclusion
Exporting data from QuickBooks Online to QuickBooks Desktop can be a crucial step in maintaining the continuity and integrity of your financial records.
This guide has discussed how to export QuickBooks Online into QuickBooks Desktop. You can ensure a seamless transition by following the comprehensive steps outlined in this guide.
This will allow you to leverage the best features of both platforms and streamline your financial management processes.
